How to change page layout on Avada WordPress theme
Having issues working your way around the Avada theme?
In this blog we will help you by:
- Navigating around the Avada theme
- Creating layouts
- Editing layouts
- Editing sections
- Using global elements
WordPress Theme: Avada – Psychology
The Avada theme is a very popular theme used with WordPress, it looks professional yet practical. However while building with this theme there were some features that we had to contend with.
The main struggle was trying to create and change new layouts.
Every new page had a pre formatted header section on it, to change one meant all the headers would change across all other pages that were using the same layout.
In order to fix this we had to establish first where the issue was coming from. In this particular theme the Avada menu on the dashboard has a menu option of… Dashboard. Going into this menu brings up the page shown below:

You should see default layouts once you have clicked on the Layouts tab.

You can see a layout called the Global Layout – this is the template used as default, this is what you would inadvertently be using if you do not wish to create/use another layout. (e.g. the Page or Alternate Page layouts – these are alternatives to Global Layout).
For this project we have ensured that there is always the navigation bar (aka Alternate Header) and footer (aka Global Footer), on each page that remains the same (unless another layout is chosen).
In other words the Alternate Header and Global Footer sections are the predetermined sections for Global Layout.
What is Manage Conditions?
To manage these layouts, you can either select the gear icon next to the name of the layout (in this case Page) or at the bottom of the section. When you hover over the bottom section it will turn blue and say ‘Manage Conditions’.
In our case the Manage Conditions section was where all the pages from the site were ‘kept’. This is what was causing the global issue.
If you click on the specific pages tab a drop down box will appear and from there you can X out of the pages that you prefer to not use with this particular layout. Tick the pages that you want the layout to stay consistent in.
Once done you can now see what pages are including the pre-formatted layout and which are excluding.
As you can see we only needed to keep one page with this particular layout (the About Us page).

All pages that are live and published on your site menu should be showing up, you may have to Load More in order to see the full list of pages.

Using the power of Avada Theme
Now we understand the theme a little better we can make your life a little easier by using this power to create something once and using it for other pages in a few simple steps.
Go to add a new page – open the new page with Avada Live builder – create a new element, insert your container. Lets make it a testimonial element for the sake of the example. Edit your testimonial element if you wish.
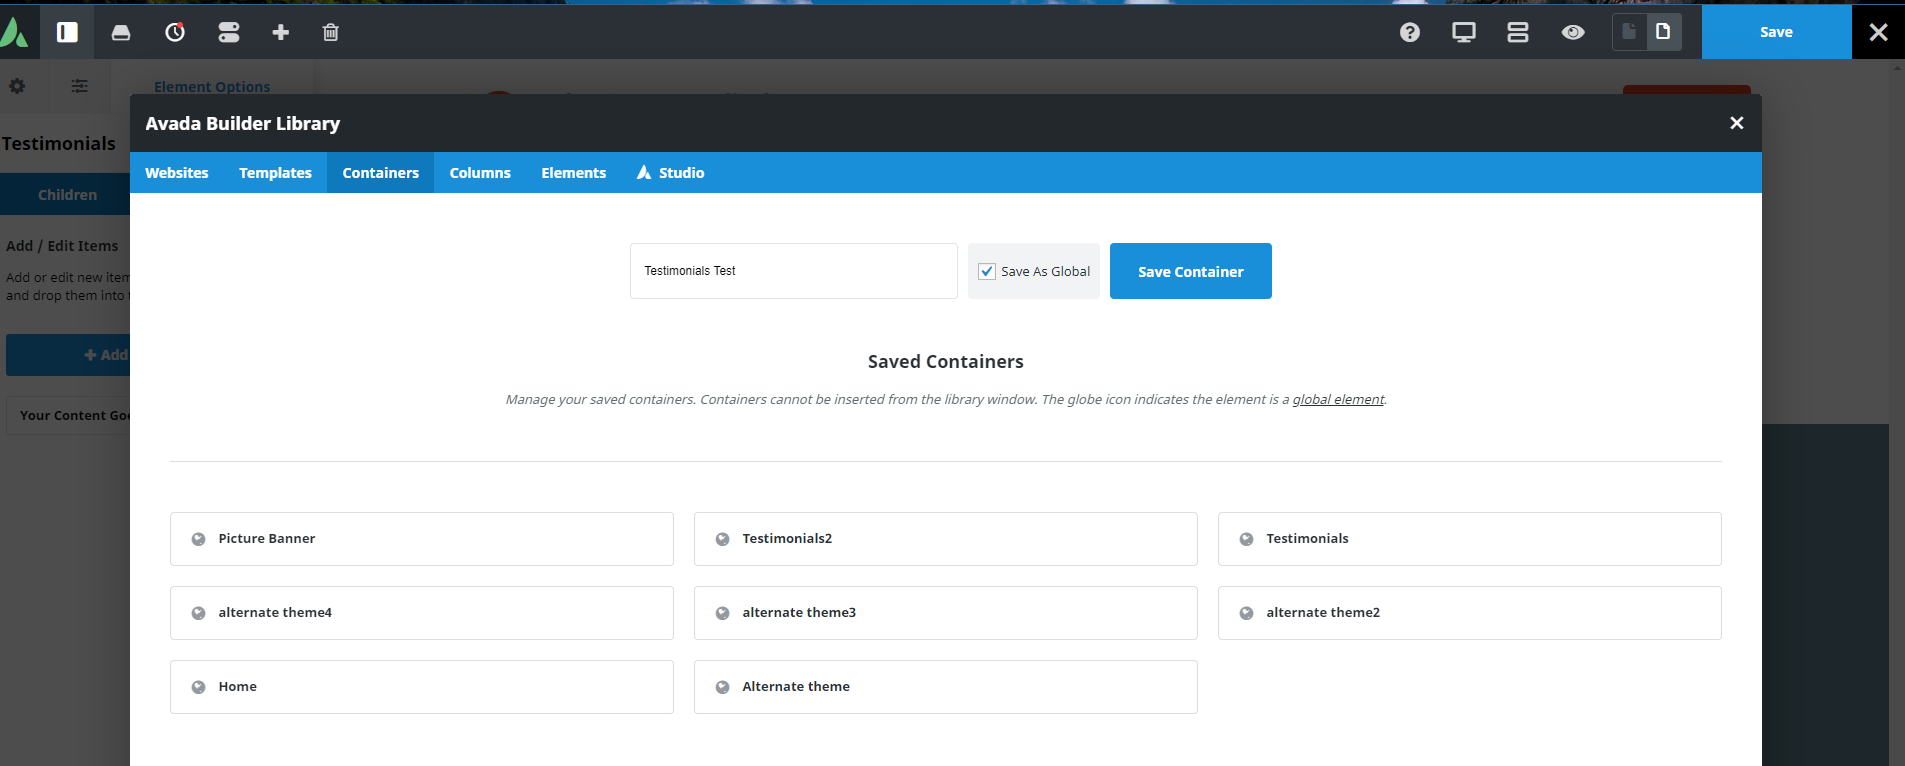
Click on the container options and navigate to and click save container. The box below should open, from there name your testimonial, enable the save as global check box and hit the save container button.
Notice anything different about your testimonial container? That’s right, it has now got a pink border when you hover over it (rather than the original blue colour). This means that you have now saved this particular element which can now be used throughout the site.
Anything amended in the element will change on all the other elements too no matter where else you have placed it. Although for this to happen the element(s) have to remain global (pink border).
If you only wish to copy and paste the saved element then change the new element that’s also possible, just make sure you change the new element to non global.
You can simply do this by clicking on the globe icon (top right of the container) which will disable the element from being global.
Notice the container colour has changed back to blue. Editing the element now will not change any other elements on the site.

Now once you create another page you can use your new global element. Once a new page is created you should see the Add Container button as seen below.

Once clicked, navigate to the Library Containers menu and hey presto there’s our newly created container.
Choose the container and you will see it appear on your new page exactly as you saved it. You will notice it also has the pink outline on hover to represent that it is global.
Please note if in case the blue Add Container button is not visible for whatever reason and you are unable to add a new container, there is another way to upload your saved container.
Go back to your dashboard – Pages menu and choose the new page. From there, choose the Avada Builder editor to see the button + Container. Now go to the Library Containers menu, pick your global container.
You can do this multiple times with different elements if needed, in order to streamline your work and save repeating yourself.
I hope this helps.
If you have any comments or questions regarding this topic feel free to contact us.
This post contains affiliate links, which means I may receive a small commission, at no cost to you, if you make a purchase through a link.


0 comments